House of Guilt Hide Spot & Strategy Tier List
S–C ranks for cover, objective priority, and solo vs group plans in ALPHA.
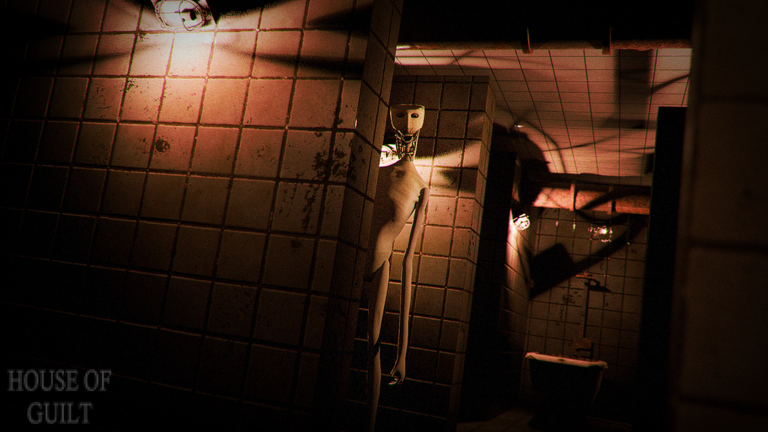
This tier list ranks hide spots and strategy priorities for House of Guilt [ALPHA]—not characters with loot rarities. In a survival/escape horror experience about investigating an abandoned house and escaping Guilt, the meta is cover quality, objective order, and whether you queue solo or in a crowd of up to 30 players.
Use this page with Survive Guilt, the Full Walkthrough, and the Guilt entity notes. Rankings reflect ALPHA lessons after the October 2026 launch and early November updates; patch retunes can shuffle a spot up or down.
Ranking criteria
| Rank | Meaning |
|---|---|
| S | Reliably saves runs when used correctly; strong LOS break + exit options |
| A | Excellent in most chases; small weaknesses under group noise or bad approach |
| B | Situational—works if Guilt’s angle is favorable |
| C | Panic picks; teach bad habits; use only as last resort |
We rank categories of cover and decisions, not unverifiable furniture IDs that may move in ALPHA.
Hide spot tiers
S-tier cover
- Deep LOS-break closets/rooms with a corner between the doorway and your body.
- Dual-exit volumes that let you leave opposite of Guilt’s entry after the pressure window.
- Off-objective quiet rooms near—but not inside—popular power/hatch traffic, so you can re-engage without camping the switch itself.
- Floor-change hides that force Guilt (and panicking teammates) to commit to stairs while you reset.
S-tier spots earn Close Call when you enter early and stay still. They also enable Untouchable attempts because they forgive one mistake without demanding god-tier jukes.
A-tier cover
- Strong single-exit closets that still break LOS if you approach from the correct side.
- Furniture pockets with partial concealment that work if Guilt is not already staring.
- Side rooms adjacent to hallways—great for audio checks, weaker if three teammates follow you in.
A-tier is the workhorse of public lobbies. Learn two A spots per wing so you are never without a plan.
B-tier cover
- Edge corners in open rooms that only work against long sightlines.
- Prop huddles that clip cameras awkwardly on Mobile.
- “Everyone’s favorite” meta closets that become death magnets once the lobby learns them.
B-tier is fine for breaking LOS mid-sprint, then rotating to A/S. Do not end a finale sequence hoping B-tier holds forever.
C-tier cover (avoid)
- Hiding in plain doorway LOS.
- Dead-end wings with no alternate exit while chased.
- Stacking the entire squad in one closet.
- Under-stair or voidy clips that soft-lock you (especially if you used noclip—don’t on mains; see ESP Survival).
- Standing “hidden” behind a teammate who is moving.
C-tier creates First Blood montages and teaches nothing transferable to Teddy Escape Ending.
Objective priority tier list
Escape structure beats random sightseeing.
S-priority objectives
- Survive long enough to map two hides per wing — without this, every objective is a coin flip.
- Restore power (Power Restored) — gates safer pathing and later interactions.
- Unlock hatch (Hatch Opened) — bridge into Ending 1/3.
A-priority objectives
- Stabilize with a Close Call-quality hide before finale commits.
- Teddy Escape Route sequence once prerequisites are real—not aspirational.
B-priority goals
- Speedrunner pathing cleanup (sub-17 minutes) after a knowledge clear.
- Untouchable discipline on a second or third serious attempt.
C-priority distractions
- Chasing fake codes during a live escape attempt.
- Testing fly/ESP hubs mid-finale on your main (Scripts).
- Lore arguments about DoctorNowhere canon mid-chase—this story is not canon anyway.
Solo vs group strategy tiers
Solo (Lone Survivor path) — S strategies
- Slow audio checks at every corner.
- Pre-clear rooms before interactions.
- Accept longer clear times; knowledge > heroics.
- Keep a personal rule: two successful hides before each major objective push.
Solo — C mistakes
- Copying public-lobby rush routes without callouts to replace.
- Tunneling teddy before power/hatch because a video title said “easy ending.”
Group — S strategies
- Split roles: watcher vs interactor.
- Diversify hides; never five-in-one-closet.
- Pre-agree a regroup S-tier room after wipes.
- Quiet callouts only—screaming “HE’S HERE” on open mic without direction helps nobody.
Group — C mistakes
- Following the loudest player into C-tier dead ends.
- Body-blocking hatch interactions for jokes.
- Flexing scripts in voice chat (report magnet + ban risk).
Situation tier list: what to do right now
| Situation | S play | C play |
|---|---|---|
| First minute in a new server | Soft explore + mark hides | Sprint to finale rooms blind |
| Audio spike mid-loot | Hide early | ”One more prop” |
| Power room contested | Wait / rotate / watcher up | All players stack the switch |
| Hatch just opened | Stabilize hide, then teddy prep | Instant noisy parade to ending |
| Friend dies nearby | Stay hidden, then relocate | Leap out for revenge juke |
| Soft-lock | Leave server | Noclip on main |
How this list supports badges
- Close Call — S/A hides entered early.
- Power Restored / Hatch Opened — S-priority objectives with watcher discipline.
- Untouchable — refuse C-tier panic picks.
- Speedrunner — cut B-priority sightseeing after knowledge.
- Lone Survivor — solo S strategies.
- Teddy Escape Route — only after S-priority prerequisites (Teddy guide).
Updating the meta
When OP horror experiences ships endings 2/3 or 3/3, finale cover ranks may change. Re-check Updates and re-test S-tier assumptions instead of memorizing one viral short forever.
Related pages
- Survive Guilt — execute these ranks under pressure
- Full Walkthrough — objective order
- Controls — make peeks and audio reliable
- Players — understand the hunter you are ranking against
- Guides Hub — full tutorial index
Play the tier list as a decision framework. The house rewards players who pick S-tier cover and S-priority objectives—not players who invent a new panic closet every death.
Frequently Asked Questions
Quick answers about endings, Guilt, and escaping the house.
Is this a character tier list?
No. House of Guilt is survival/escape horror. This list ranks hide spots, objective priorities, and solo vs group strategies.
What makes a hide S-tier?
Reliable line-of-sight breaks, sane exit options, and the ability to survive a nearby Guilt pressure window when entered early.
Should groups share one meta closet?
No. Stacked hides are C-tier behavior. Diversify cover so one discovery does not wipe everyone.
What should I prioritize first each run?
Map safe hides, restore power, unlock the hatch, then attempt the Teddy Escape Route. Badge flexes come after knowledge clears.
Will these ranks change in later ALPHA patches?
They can. Lighting, AI, and new endings may reshuffle cover quality—re-test after updates.